This chord has 4 voicings across the fretboard. Use the arrows to see each shape and fingering — and tap any dot on the diagram to hear that note.
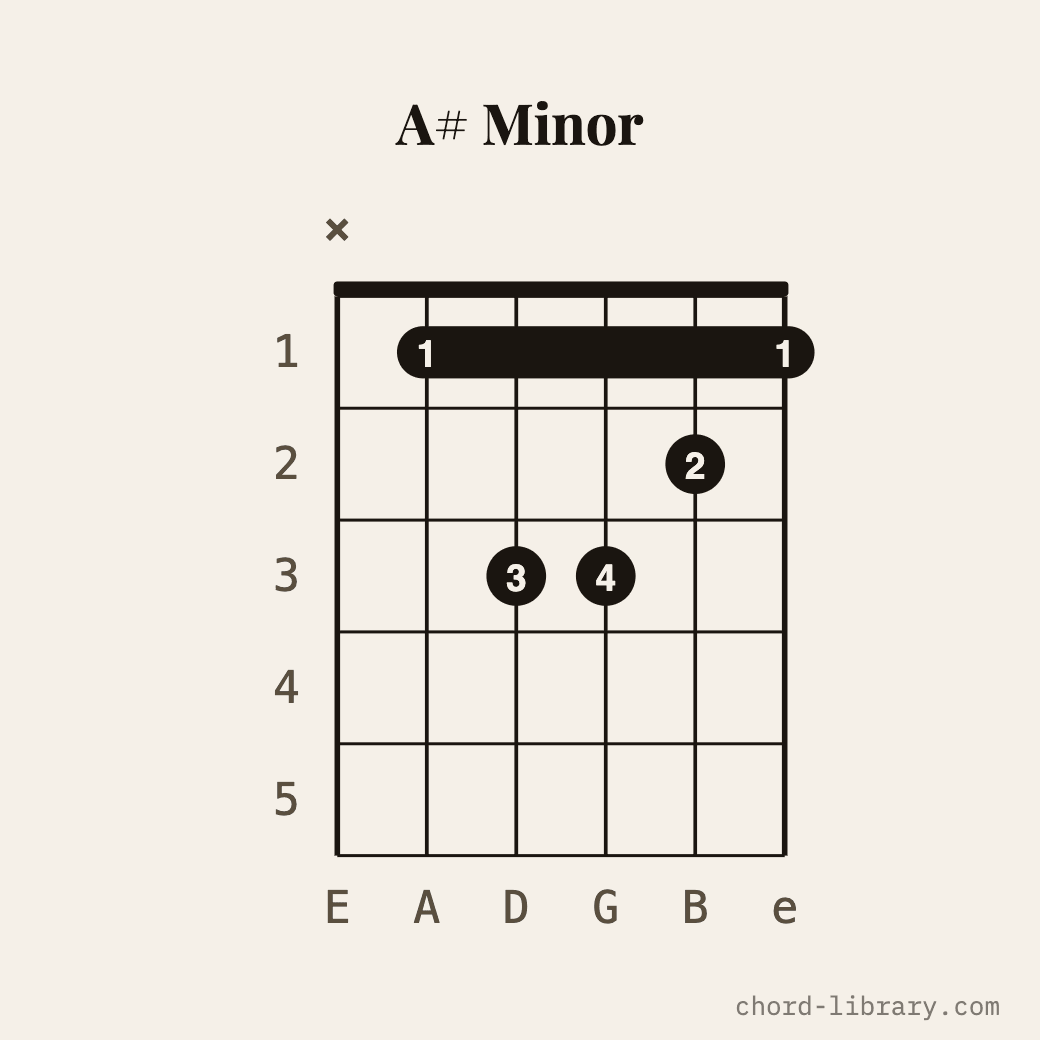
A# Minor Guitar Chord
A barre chord at the 1st fret. A# Minor is dark and rich.
Also known as
- A#m
- A#-
- Bbm
- Bb-
- A# m
- Bb m
- A#min
- Bbmin
- A# min
- Bb min
- A#minor
- Bbminor
- B-flatm
- B-flat-
- A# minor
- A-sharpm
- A-sharp-
- Bb minor
- B-flat m
- A-sharp m
- B-flatmin
- A-sharpmin
- B-flat min
- A-sharp min
- B-flatminor
- A-sharpminor
- B-flat minor
- A-sharp minor
How to Play This Chord
Position your fingers on the fretboard as shown in the diagram. The vertical lines represent the strings, from low E (left) to high E (right), and the horizontal lines are the frets. Numbers inside the dots indicate which finger to use: 1 (index), 2 (middle), 3 (ring), 4 (pinky). An X means don't play that string; an O means play it open. A bar spanning multiple strings means one finger presses across all of them at once — this is known as a barre chord.
Tips & Tricks
The barre at the 1st fret (Am shape) or the 6th fret (Em shape) are your options. A#m/Bbm appears in the keys of Db and Gb, which are less common on guitar. If you're struggling with the 1st-fret barre, the 6th-fret position offers better string tension.
There are many ways to play this chord. Try these:
Download this chord chart
Save the diagram as a high-resolution image — perfect for printing, sharing, or your practice notes.
Download PNG